Here are handy tips on how to pack food you might be bringing along on your camping trip. We have tried to suggest items that are easily found at your grocery store. Remember, you don't have to bring all of this stuff. Just tailor your ingredients to fit your camping or rafting menus.
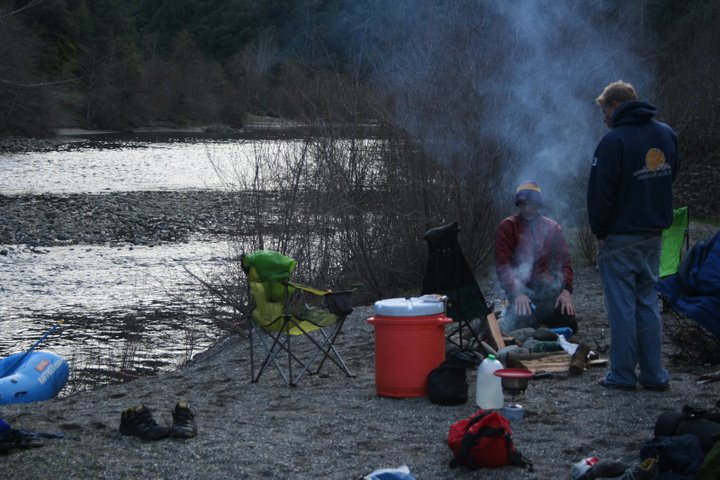
camping and cooking on the middle fork american river
I always pack oyster sauce because it can be added to just about everything! And, in California, most grocery stores now have many exotic items that will bring a sense of flair to your outdoor cooking. Enjoy!
packed coolers for the gear boat on a wilderness rafting trip
Meats:
- Marinate your steaks, chicken prior to packing them.
- Use sturdy zip lock freezer bags and add your favorite marinade.
- Pack these tasty packages next to the ice in your cooler.
- When you get to your destination; add chopped green onions/scallions (leaves and bulb)
- Carefully pull out the meats to grill on the stove or campfire grill.
Herbs, spices, onions & garlic:
- Dry spices are the easiest.
- Fresh spices and herbs taste the best!
- Wrap each herb/spice in a dry paper towel.
- Place each bundle in a zip lock baggie.
- These will last throughout the duration of a short term camping trip (2 to 5 days).
- Rosemary, garlic and onions are the easiest to pack and pack the most flavor to any dish.
- Keep all herbs, spices, onions & garlic as dry as possible.
Vegetables & Fruits:
- potato (breakfast, lunch, dinner)
- celery (sturdy, keeps well; add to canned soups or vegetable saute)
- carrots (sturdy; add to salads or shred for toppings on sandwiches)
- onions (everything!)
- cabbage (salads, quick saute, etc)
- beets (wrap & bake in coals or roast on grill; slice for sandwich, salad or side dish)
- sweet potato (wrap & bake in coals or roast on grill; side dish)
- apples (sturdy, keep cool; bake or saute slices w/ sugar, cinnamon for a great dessert over cake or pound cake)
- bananas (fragile, use first or second day; great additions to cereal or saute as side dish)
- oranges (sturdy; add juice to salad dressing, slice away membrane and add to dessert)
- greens (wrap fragile leaves in paper towels or clean towel and place greens into a dry zip lock baggie; use on first or second days of cooking)
Suggested staples:
- rice
- potatoes
- pasta
- meats
- tortillas/wraps
- bread
- eggs (keep in egg container; they will survive if placed on top of cooler)
- dry soups
- canned soups
- canned chile con carne
- canned red kidney beans
- canned corn
- hot chocolate
- mint candies (add to hot chocolate or crushed over a dessert)
- muesli or dry cereal (add to nuts, raisins for a quick snack)
- boxed cake yellow mix
- pound cake
- bisquick
- sliced deli meats
- cheese block or sliced
- small amount of flour (dust chopping board or make a gravy w/ meat juices in your grill pan)
- butter (great on toast; mix in garlic/herbs for a simple topping on steaks)
- sugar (add to hot chocolate or sprinkle on toast w/ cinnamon)
- olive oil for saute, cake mix or condiment
- saffola oil for frying
- balsamic vinegar (or apple cider vinegar; great for quick salad dressing or seasoning)
- asian oyster sauce (awesome on stir fried vegetables; marinade for meats)
- ketchup
- mustard
- salt
- pepper
More staples:
- sturdy zip lock baggies in different sizes
- paper towels
- knives
- cutlery
- serving utensils
- aluminum foil
- tongs
- channel lock (handy tool to pick up hot items such as grills)
- oven mitt or silicon glove
- chopping boards (plastic)
- plates (plastic or metal)
- cups (plastic or metal)
- bowls of various sizes for mixing & prep work (plastic or metal)
- dish soap (biodegradable)
- hand soap (biodegradable)
- black sharpie pen (label stuff as you prep and work in kitchen)
- paper bags (great for soaking up oils on fried items; also good for organizing items)
Pre-prepare for ease of use:
- baked potatoes (use first day or second day for a quick breakfast hash or as a potato salad for lunch)
- mixed spices in a waterproof plastic container (salt, pepper, chili, rosemary or whatever you want to mix together) labeled w/ ingredients
- frozen homemade soup (this is killa! its a block of frozen soup that will help keep the cooler cool)
- cake mixes and any other boxed items; place dry goods into sturdy zip lock baggies (tear off the labels and toss into bag to identify your dry goods; this will take less space when you pack your dry goods)
- mix butter & garlic together and freeze it (use on toasted bread or top a grilled steak)
- make a cold pasta salad w/ broccoli, carrots, olives & peppers; toss into zip lock baggie for a first lunch or first dinner*
- if you make baked potatoes at camp, make more than you need; use left overs for salad, side dishes or an entree
- same with rice; make more than you need if you make it at camp; use for salads, side dish or an entree
Tips for the cooler:
- Use block ice or dry ice to keep items cold. Pack all meats and perishables near the ice. Pack apples, veggies towards the top. Keep drinks and frequently needed items in a smaller cooler and tell everyone not to open the other coolers. This will keep items nice and cold.
- Instead of one large cooler, use several smaller ones. Duct tape the coolers closed and label them accordingly: Day 1, Day 2, etc. This will help to keep perishables cold. But, this also requires you to break up items and pack the coolers wisely for each day. (Grand Canyon Colorado trick where we can be on the river for 12 days or more!)
- I had ice cream on day 5 of a river trip using a small cooler and dry ice; duct taped and never opened until the day we wanted it.
- Don't leave the cooler in the hot sun or place the bottom in the hot sand on the beach. Place under a tree instead or place on top of a folded blanket if you only have hot sand. Keep the cooler cool so it doesn't work so hard keeping your items cool. Another trick is to leave it in the raft on the water. Just take out your cooking items and walk it to the grill on the beach (use the handy paper shopping bags or a sturdy tote to carry your items) Beach side may be warm at night, but the cooler air above the river will help to keep the cooler cold.
Phobia about bruised or blackened vegetables:
On a long trip, some of your fruits and vegetables will start to perish. Cut off the blackened portions and the interior will be fine for cooking. Cabbage can be peeled until you get back to good leaves. Onions, too, can be peeled back. Don't just toss away a bunch of veggies because they look limp or dried out. Rinse with water and they will perk back up to almost their original state.
First meal:
You just drove from ying to yang and you are tired. No one wants to cook a complicated first meal on the first day of your rafting, camping trip or car travels. I always bring an extra large can of chile. Add extra canned corn and red kidney beans to the pot. Dice some onion and add it. Stir until hot. Serve w/ tortillas or chips. Quick meal! and everyone will be happy. You can do the same thing w/ a favorite canned soup. Just add a few veggies and serve with tortillas or toasted bread w/ garlic butter.
Enjoy!:
Let's face it. Food cooked outdoors always taste better! Don't get too complicated. Don't be afraid to use prepared, boxed, canned or pre-made items. Shhh, no one needs to know! I love taking a pound cake and adding fresh fruit on top such as orange membranes w/ an orange sugar glaze poured over the top. Super quick to make and very tasty. Don't be afraid to omit meats on a menu. Have a vegetable roast instead w/ crusty toasted breads and a light soup instead. Or just roll the roasted ingredients into a tortilla and and eat hearty as any vegetarian.
Or just get on the phone and call your favorite whitewater rafting company (us!) and let them do all the cooking and cleaning. You might enjoy your time outdoors even more... 2010 Summer rafting ... here we goooooooooo!
Notes: if you have a suggestion for this list, please let us know. We would love to get more camp cooking tips! You might even get invited to a WET River Trips to show your camp chef skills!


